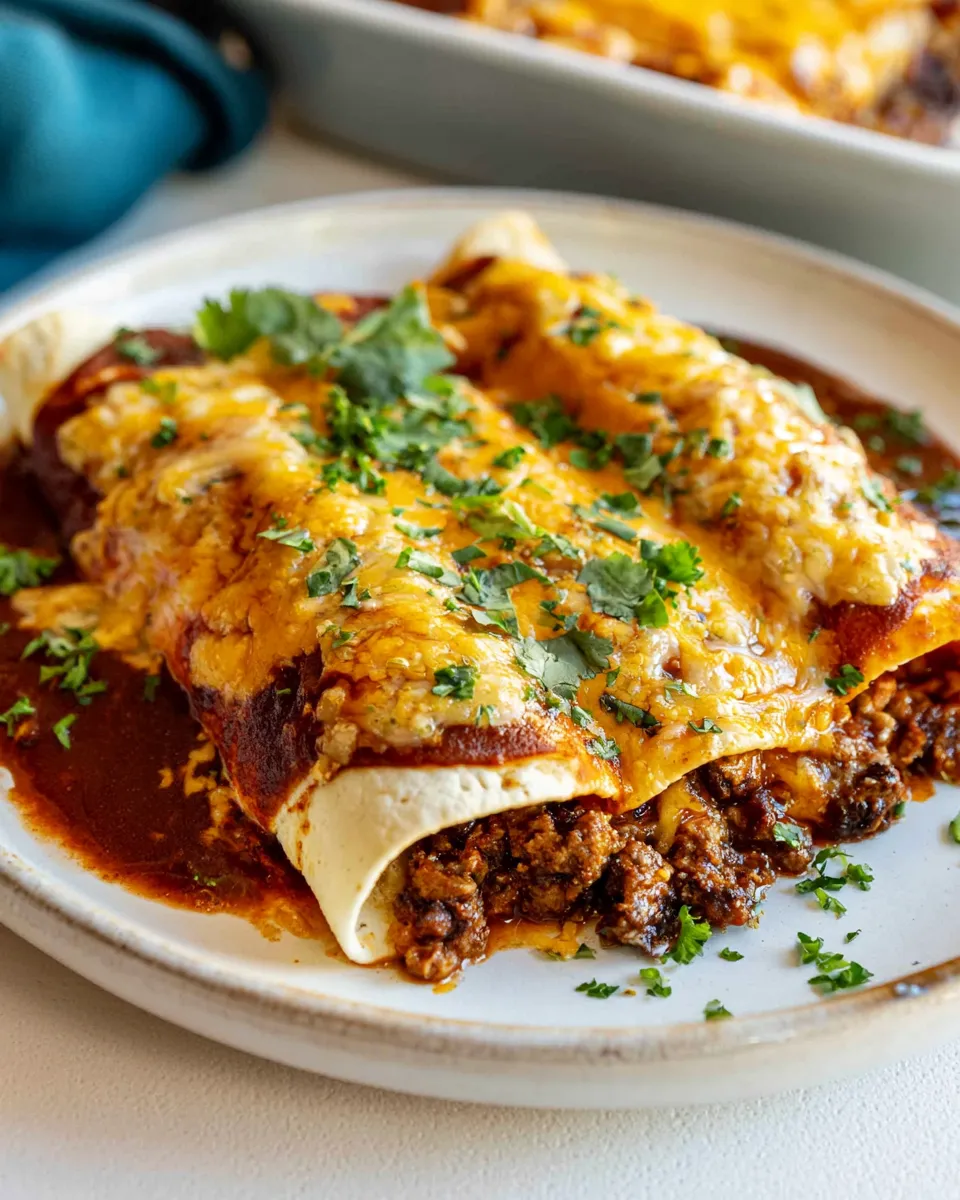
Get ready! There is a specific kind of panic that sets in when you realize you have a dozen people coming over for dinner, and you haven’t started cooking yet. I’ve been there more times than I care to admit. I used to spend hours rolling individual enchiladas, ending up with sauce up to my elbows and a sink full of dishes. That’s precisely when I came up with this big batch chicken enchilada casserole.
Though traditional rolled enchiladas are classic, I wanted a method that delivered all those bold, vibrant flavors without the assembly-line stress. This chicken enchilada casserole recipe is the answer. It packs a punch with a zippy, homemade chicken filling and layers of gooey cheese, all constructed in a “lasagna-style” stack that saves you serious time.
Whether you are hosting a game night, prepping for a family reunion, or want weeknight chicken enchilada casserole ideas that leave you with leftovers for days, this recipe is totally crave-worthy. It serves 8–12 people comfortably, making it the ultimate secret weapon for stress-free hosting.

Table of Contents
Big Batch Chicken Enchilada Casserole
Ingredients
For the Seasoning Mix:
- ½ teaspoon onion powder
- ½ teaspoon garlic powder
- ½ teaspoon ground cumin
- ½ teaspoon paprika
- ½ teaspoon dried oregano
- ½ teaspoon chili powder
For the Chicken Filling:
- 1-2 tablespoons avocado oil or olive oil
- ½ yellow onion finely diced
- 3 cloves garlic minced
- 3 cups cooked shredded chicken
- Salt and black pepper to taste
- 1 15 oz. can black beans, drained and rinsed
- 1 4 oz. can diced green chiles, undrained
- 2 tablespoons fresh lime juice
- 1 teaspoon hot sauce
- 1 teaspoon honey
- 2 tablespoons fresh cilantro finely chopped
For the Assembly:
- 20 oz. red enchilada sauce homemade or store-bought
- 8 6-inch flour or corn tortillas
- 3½ cups shredded Mexican cheese blend divided
For Serving:
- Sour cream tortilla chips, fresh cilantro, diced tomatoes, diced avocados, sliced jalapeños, diced red onions
Instructions
- Prep & Season: Preheat your oven to 350°F. In a small bowl, combine all the seasoning mix ingredients (onion powder, garlic powder, cumin, paprika, oregano, and chili powder) and set aside. If your shredded chicken isn’t already seasoned, season it generously with salt and pepper to taste. Measure out all remaining ingredients and have them ready for quick assembly.
- Sauté the Aromatics: Heat 1-2 tablespoons of avocado oil in a large skillet over medium heat. Add the diced yellow onion and cook for 5 minutes, stirring occasionally, until softened and translucent. Add the minced garlic and cook for 1 additional minute until fragrant, stirring constantly to prevent burning.
- Build the Flavor Base: Reduce the heat to medium-low. Add the shredded chicken to the skillet along with your prepared seasoning mix, tossing everything together until the chicken is evenly coated with the spices. Stir in the black beans, diced green chiles (with their liquid), lime juice, hot sauce, honey, and chopped cilantro. Cook for 1-2 minutes, stirring frequently, until everything is heated through and the flavors begin to meld together. Remove from heat and set aside.
- Start the First Layer: Spread ¼ cup of enchilada sauce evenly across the bottom of a 9×13-inch casserole dish, this thin layer prevents sticking and adds moisture. Cut each tortilla in half to create 16 half-circles. Arrange 8 tortilla halves in the dish, placing 6 with their flat edges along the sides of the dish (touching the walls) and 2 in the middle to cover the bottom completely.
- Layer the Magic: Spread half of your prepared chicken filling evenly over the tortilla layer. Drizzle 1 cup of enchilada sauce over the chicken mixture, using the back of a spoon to distribute it evenly. Sprinkle 1½ cups of shredded cheese over the sauce, creating an even layer that will melt into cheesy perfection.
- Repeat the Layers: Arrange the remaining 8 tortilla halves over the cheese layer in the same pattern as before. Top with the remaining chicken filling, spreading it evenly. Drizzle another 1 cup of enchilada sauce over the filling, then finish with the remaining 2 cups of shredded cheese, ensuring complete coverage for that golden, bubbly top.
- Bake to Perfection: Cover the casserole dish tightly with aluminum foil and bake in your preheated oven for 15 minutes. This covered baking time allows the cheese to melt and the flavors to marry. Remove the foil and bake for an additional 15 minutes uncovered, until the cheese is beautifully golden and bubbling around the edges.
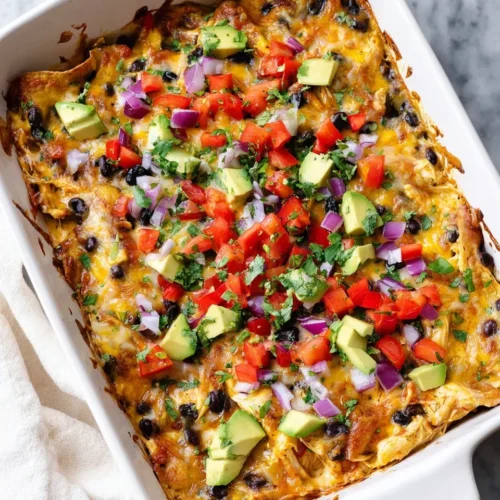
- Finish & Serve: Remove from the oven and let rest for 5 minutes before serving, this allows the casserole to set slightly for cleaner slicing. Garnish generously with fresh chopped cilantro, diced tomatoes, avocados, red onions, and jalapeños. Serve hot with dollops of sour cream and crispy tortilla chips on the side for scooping up every last bit of that delicious filling!
Nutrition
Why You’ll Love This Casserole
It’s not just about volume; it’s about flavor and ease.
- Scalable: This recipe is designed for 8-12 servings, but it can be easily adjusted to accommodate more or fewer servings.
- Texture Perfection: By layering cut tortillas instead of rolling them, you get a consistent distribution of sauce, meat, and cheese in every bite.
- Customizable: You can choose between red or green sauce, depending on your preference.
Ingredients
Here is what you need to whip up this glossy, decadent dinner. I’ve broken it down to keep it simple.
For the Seasoning Mix:
- ½ teaspoon onion powder
- ½ teaspoon garlic powder
- ½ teaspoon ground cumin
- ½ teaspoon paprika
- ½ teaspoon dried oregano
- ½ teaspoon chili powder
For the Chicken Filling:
- 1-2 tablespoons avocado oil (or olive oil if that’s what you have on hand)
- ½ yellow onion, finely diced
- 3 cloves garlic, minced
- 3 cups cooked, shredded chicken (a Rotisserie chicken works perfectly here for a shortcut!)
- Salt and black pepper, to taste
- 1 (15 oz.) can black beans, drained and rinsed
- 1 (4 oz.) can diced green chiles, undrained
- 2 tablespoons fresh lime juice
- 1 teaspoon hot sauce (optional, but adds a nice kick)
- 1 teaspoon honey (This balances the acidity beautifully)
- 2 tablespoons fresh cilantro, finely chopped
For the Assembly:
- 20 oz. red enchilada sauce (homemade or store-bought, both work great)
- 8 (6-inch) flour or corn tortillas
- 3½ cups shredded Mexican cheese blend, divided
For Serving:
- Sour cream
- Tortilla chips
- Fresh cilantro, chopped
- Diced tomatoes
- Diced avocados
- Sliced jalapeños
- Diced red onions
Instructions
Here are the steps to building this masterpiece. It’s a one-pan chicken enchilada casserole process once you get to the assembly!
1. Prep & Season Preheat your oven to 350°F. In a small bowl, combine all the seasoning mix ingredients (onion powder, garlic powder, cumin, paprika, oregano, and chili powder) and set aside. If your shredded chicken isn’t already seasoned, season it generously with salt and pepper to taste. Measure out all remaining ingredients and have them ready for quick assembly.
2. Sauté the Aromatics Heat 1-2 tablespoons of avocado oil in a large skillet over medium heat. Add the diced yellow onion and cook for 5 minutes, stirring occasionally, until softened and translucent. Add the minced garlic and cook for an additional minute, stirring constantly to prevent burning, until fragrant. This step builds a savory foundation that makes the final dish taste homemade, even if you use store-bought sauce!

3. Build the Flavor Base. Reduce the heat to medium-low. Add the shredded chicken to the skillet, along with your prepared seasoning mix, and toss everything together until the chicken is evenly coated with the spices. Stir in the black beans, diced green chiles (with their liquid), lime juice, hot sauce, honey, and chopped cilantro. Cook for 1-2 minutes, stirring frequently, until everything is heated through and the flavors begin to meld together. Remove from heat and set aside.
Tip: The honey might sound unusual, but it cuts through the acidity of the lime and chiles perfectly.
4. Start the First Layer Spread ¼ cup of enchilada sauce evenly across the bottom of a 9×13-inch casserole dish. This thin layer prevents sticking and adds moisture. Cut each tortilla in half to create 16 half-circles. Arrange eight tortilla halves in the dish, placing 6 with their flat edges along the sides of the dish (touching the walls) and 2 in the middle to cover the bottom completely.

5. Layer the Magic Spread half of your prepared chicken filling evenly over the tortilla layer. Drizzle 1 cup of enchilada sauce over the chicken mixture, using the back of a spoon to distribute it evenly. Sprinkle 1½ cups of shredded cheese over the sauce, creating an even layer that will melt into cheesy perfection. This layering technique helps you avoid the dreaded soggy bottom often found in enchiladas.

6. Repeat the Layers. Arrange the remaining eight tortilla halves over the cheese layer in the same pattern as before. Top with the remaining chicken filling, spreading it evenly across the surface. Drizzle another 1 cup of enchilada sauce over the filling, then finish with the remaining 2 cups of shredded cheese, ensuring complete coverage for that golden, bubbly top.
7. Bake to Perfection Cover the casserole dish tightly with aluminum foil and bake in your preheated oven for 15 minutes. This covered baking time allows the cheese to melt and the flavors to marry. Remove the foil and bake for an additional 15 minutes uncovered, until the cheese is beautifully golden and bubbling around the edges.
8. Finish & Serve Remove from the oven and let rest for 5 minutes before serving. This allows the casserole to set slightly, resulting in cleaner slicing. Garnish generously with fresh chopped cilantro, diced tomatoes, avocados, red onions, and jalapeños. Serve hot with dollops of sour cream and crispy tortilla chips on the side for scooping up every last bit of that delicious filling!

Tips & Variations for the Perfect Casserole
I love this recipe because it is so forgiving. Here are a few ways to adapt it to your lifestyle or dietary needs.
Make-Ahead and Freezer-Friendly Options
If you are planning a big event, this is the ultimate make-ahead chicken enchilada casserole.
- Fridge: You can assemble the entire casserole up to 24 hours in advance. Just cover it tightly with foil and pop it in the refrigerator. When you are ready to eat, add about 5-10 minutes to the covered baking time since you are starting with a cold dish.
- Freezer-Friendly Chicken Enchilada Casserole: For a freezer-friendly dish, assemble the casserole in a disposable aluminum pan. Cover it with plastic wrap and then foil to prevent freezer burn. It will keep for up to 3 months. Thaw it in the fridge overnight before baking for the best texture.

Texture and Flavor Swaps
- Tortillas: I usually opt for flour tortillas because they hold up well in casseroles; however, you can also use corn tortillas for a more traditional texture. If you use corn, I recommend lightly frying them in oil for a few seconds first to create a barrier against the sauce.
- Cheesy Goodness: While I use a Mexican blend, feel free to experiment! A creamy chicken enchilada casserole, made with enchilada sauce and Monterey Jack or Pepper Jack, adds a great melt and a bit of heat.
- Low-Fat Variations: For a low-fat chicken enchilada casserole, swap the sour cream garnish for Greek yogurt and use reduced-fat cheese. You can also bulk up the filling with extra veggies like corn, zucchini, or bell peppers to reduce the meat-to-veg ratio.
Vegetarian Adaptation
Looking for a meat-free option? You can easily turn this into a cheesy chicken enchilada casserole with tortillas (minus the chicken!) by doubling the black beans and adding corn, roasted sweet potatoes, or sautéed spinach.
What to Serve With Chicken Enchilada Casserole
Since this big batch chicken enchilada casserole is quite rich, I like to pair it with sides that bring brightness and acidity to the plate.
- Mexican Street Corn Salad: A fresh, zesty salad featuring corn, cotija cheese, and lime is the perfect complement to the savory casserole.
- Cilantro Lime Rice: If you have hungry teenagers to feed, a side of fluffy rice helps stretch the meal even further.
- Simple Green Salad: Toss mixed greens with a vinaigrette made from lime juice, olive oil, and a pinch of cumin. It cuts through the richness of the cheese beautifully.
Frequently Asked Questions
How do you keep enchilada casserole from getting soggy?
The trick is in the layering! By ensuring your bottom layer is tortillas and not sauce, you create a solid foundation. Additionally, using flour tortillas tends to result in a sturdier casserole than corn tortillas, which tend to break down more quickly. If using corn, briefly frying them in oil before layering helps create a moisture barrier.
Can you batch cook enchiladas?
Absolutely! That is the beauty of this recipe. Because you are layering rather than rolling, you can easily double this recipe into two 9×13 pans. It is the perfect easy chicken enchilada casserole for a crowd or for meal prepping a month’s worth of dinners at once.
What is the difference between enchiladas and enchilada casserole?
Traditional enchiladas involve rolling the filling inside individual tortillas and placing them side by side. An enchilada casserole (sometimes called “enchilada lasagna”) stacks the ingredients in flat layers. The flavors are identical, but the casserole method is much faster and easier to portion for large groups.
Can chicken enchiladas be prepared ahead of time?
Yes, this is a fantastic make-ahead chicken enchilada casserole. You can assemble the entire dish, cover it, and store it in the refrigerator for up to 24 hours before baking. This actually allows the flavors to meld even more, making it taste even better the next day.
Conclusion
I hope this big-batch chicken enchilada casserole becomes a staple in your kitchen, just like it has in mine. It is one of those dinners that feels special enough for company but is easy enough for a Tuesday night. The combination of tender shredded chicken, zesty sauce, and melted cheese is simply unbeatable.
If you whip this up, I would love to hear how it went! Did you stick to the recipe or add your own twist? Leave a comment below and let me know. I am always looking for new inspiration!