Introduction
Get ready for the fudgiest, most decadent treat that actually works for everyone! I remember hosting a dinner party last year where half the table was gluten-free, and the other half was strictly vegan. I was spiraling, trying to figure out a dessert that wouldn’t leave anyone feeling left out (or stuck with a dry, sad fruit salad). That’s when I started experimenting with this adaptable brownie recipe.
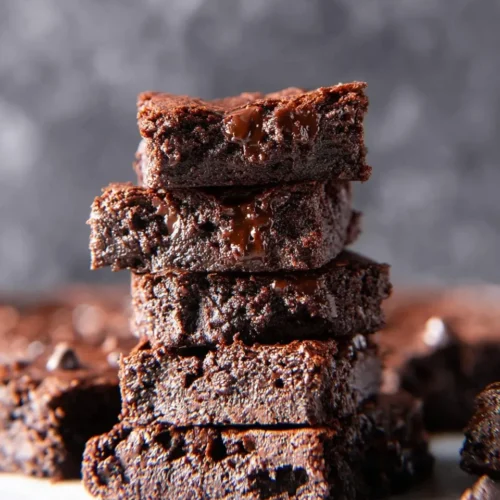
Unlike those cardboard-like allergy-friendly desserts we’ve all suffered through, this base recipe transforms into perfectly customized, gooey squares regardless of your dietary needs. Whether you need vegan gluten-free brownies or a nut-free version for school lunches, this one-bowl wonder delivers that crackly top and dense, chewy center we all crave. It’s not about compromising on flavor; it’s about using innovative ingredients like almond butter and flax eggs to create a texture that rivals any bakery box. You can whip this up in under 45 minutes. Most people won’t even guess they’re eating a “healthier” version until you tell them!

Table of Contents
Adaptable Brownie Recipe (Vegan, Gluten-Free & Dairy-Free Options)
Ingredients
For the Flax Eggs:
- 2 tablespoons golden ground flaxseed
- 6 tablespoons water
For the Brownie Batter:
- ¼ cup natural unsalted creamy almond butter (or nut butter of choice)
- ½ cup coconut sugar
- ⅓ cup pure maple syrup
- ¼ cup + 2 tablespoons melted coconut oil
- ¾ cup unsweetened cocoa powder or raw cacao powder
- 1 teaspoon pure vanilla extract
- ¼ teaspoon salt
- ¼ cup + 2 tablespoons gluten-free oat flour finely ground
- ½ cup vegan chocolate chips
Instructions
- Make the Flax Eggs: In a small bowl, whisk together the golden ground flaxseed and water until well combined. Set aside and let it sit undisturbed for at least 15 minutes; the mixture will thicken into a gel-like consistency that perfectly mimics the binding and moisture properties of traditional eggs. This step is essential, so don't skip it!
- Preheat & Prepare: While your flax eggs are setting, preheat your oven to 325°F (163°C). Line an 8-inch square baking pan with parchment paper, leaving some overhang on the sides for easy lifting later. If you don’t have parchment paper, generously grease the pan with coconut oil instead.
- Build the Wet Base: In a medium mixing bowl, whisk together the creamy almond butter, coconut sugar, pure maple syrup, and melted coconut oil until smooth and glossy. This is the foundation of your brownies. Take your time whisking until there are no lumps and everything is beautifully incorporated.
- Add the Cocoa & Wet Ingredients: Add the cocoa powder to the bowl in ¼ cup increments, whisking thoroughly after each addition until the mixture is shiny and incredibly smooth. Scrape down the sides of the bowl with a spatula as needed to ensure everything is evenly mixed. Once all the cocoa powder is fully incorporated, whisk in the pure vanilla extract, salt, and the prepared flax eggs until everything comes together into a rich, dark, velvety batter.
- Fold in the Flour & Chocolate Chips: Using a rubber spatula, gently fold in the gluten-free oat flour in thirds, adding it gradually and folding after each addition until no dry flour patches remain in the batter. Be gentle here; overmixing can make the brownies tough. Once the batter is smooth and resembles a soft, thick dough, fold in the vegan chocolate chips, distributing them evenly throughout.
- Bake: Pour the brownie batter into the prepared 8-inch square pan. Using your rubber spatula, smooth the batter into an even layer, making sure it reaches all the corners. Bake at 325°F for 26–34 minutes. The brownies are done when the top is set and just slightly cracked around the edges, but the center still looks slightly underdone, this is the key to achieving that perfect fudgy texture! Remove from oven.
- Cool, Slice & Serve: Let the brownies cool completely in the pan for at least 1 full hour before slicing. The brownies will continue to set and firm up as they cool, and cutting too early will result in a crumbly mess. Once fully cooled, use the parchment paper overhang to lift the entire slab out of the pan. Place on a cutting board and slice into 9 larger squares or 16 smaller bite-sized pieces.
Nutrition
Ingredients
Here is everything you need to build your perfect brownie base. I’ve kept the list short and sweet because baking shouldn’t require a memorable trip to three different grocery stores.
- 2 tablespoons golden ground flaxseed (for the binder)
- 6 tablespoons water
- ¼ cup natural, unsalted creamy almond butter (or nut butter of choice)
- ½ cup coconut sugar
- ⅓ cup pure maple syrup
- ¼ cup + 2 tablespoons melted coconut oil
- ¾ cup unsweetened cocoa powder or raw cacao powder
- 1 teaspoon pure vanilla extract
- ¼ teaspoon salt
- ¼ cup + 2 tablespoons gluten-free oat flour (finely ground)
- ½ cup vegan chocolate chips
How to Make Adaptable Brownies
Here are the steps to chocolate perfection. Don’t worry if you haven’t baked with flax eggs or oat flour before; I’ll walk you through exactly what to look for at each stage.
- Activate the Binder: First, we need to make the flax eggs. In a small bowl, whisk together the golden ground flaxseed and water until well combined. Set this aside and let it sit undisturbed for at least 15 minutes. During this time, the mixture will thicken into a gel-like consistency that perfectly mimics the binding power of traditional eggs. This step is essential for that chewy texture, so don’t skip it!
- Preheat & Prepare: While your flax eggs do their magic, preheat the oven to 325°F (163°C). Grab an 8-inch square baking pan and line it with parchment paper. I highly recommend leaving some overhang on the sides; it makes lifting the brownies out later a total breeze. If you’re out of parchment, generous greasing with coconut oil works too.
- Build the Glossy Base: In a medium mixing bowl, whisk together the creamy almond butter, coconut sugar, pure maple syrup, and melted coconut oil. You want to whisk this until the mixture is entirely smooth and resembles a gorgeous, glossy caramel. This is the foundation of your brownies; take a moment here to ensure there are no lumps and everything is beautifully incorporated. The warm oil helps dissolve the sugar slightly, which contributes to that shiny crust we love.
- Add the Chocolate & Flavor: Add the cocoa powder to your wet mixture in ¼ cup increments. Whisk thoroughly after each addition until the mixture is shiny and incredibly smooth. It might look a bit thick at first, but keep going! Scrape down the sides of the bowl with a spatula to catch any stray powder. Once the cocoa is fully incorporated, whisk in the pure vanilla extract, salt, and your thickened flax eggs. The batter should now look rich, dark, and velvety.
- Fold for Texture: Using a rubber spatula, gently fold in the gluten-free oat flour in thirds. Add it gradually, folding after each addition until no dry flour patches remain. Be gentle here; even with gluten-free flour, keeping the mixing to a minimum ensures a tender bite. Once the batter resembles a soft, thick dough, fold in the vegan chocolate chips. Make sure to distribute them evenly so you get a hit of melted chocolate in every single bite.
- Bake to Perfection: Pour the batter into your prepared pan and use your spatula to smooth it into an even layer, pushing it right into the corners. Pop it in the oven at 325°F for 26–34 minutes. You’re looking for the top to be set and just slightly cracked around the edges, but the center should still look slightly underdone. This is the secret to achieving that perfect one-bowl adaptable brownie fudginess!
- The Hardest Part (Cooling): Remove the pan from the oven and set it on a wire rack. Now, you must let the brownies cool completely in the pan for at least 1 full hour. I know, the smell is torture! But these brownies rely on residual heat to finish setting. Cutting them too early will result in a crumbly mess. Once thoroughly cooled, use the parchment overhang to lift the slab out, slice into 9 large squares (or 16 bites), and enjoy!

Tips, Variations & Dietary Swaps
The beauty of this recipe is in its flexibility. I designed this to be a dietary-accommodating dessert hub, so feel free to tweak it based on what’s in your pantry or your guests’ needs.
- Nut-Free Option: If you need allergy-friendly chocolate brownies for a nut-free school zone, swap the almond butter for sunflower seed butter or pumpkin seed butter. Just keep in mind that sunflower butter can sometimes react with baking powder (turning things green!), but since we aren’t using baking powder here, you are totally safe.
- Flour Alternatives: I love oat flour for its sweet, nutty flavor, but you can also use a standard gluten-free 1:1 baking flour blend. If you aren’t gluten-free, standard all-purpose flour can be swapped in at the same ratio.
- Sugar Swaps: The coconut sugar adds a lovely caramel note, but brown sugar works just as well if that’s what you have on hand. It adds more moisture, making them even fudgier!
- Texture Boost: For extra crunch, try adding chopped walnuts or pecans along with the chocolate chips. The contrast between the soft brownie and the crunchy nuts is totally crave-worthy.
- Make it “Cheesecake” Swirled: For a vegetarian option (if you eat dairy), swirl in a bit of cream cheese sweetened with maple syrup before baking. For a vegan version, use a plant-based cream cheese brand.

What to Serve With Brownies
While these brownies pack a punch on their own, dressing them up turns a simple snack into a full-blown dessert experience.
- Coconut Whipped Cream: To keep things dairy-free, top a warm square with a dollop of coconut whip. The cool, creamy texture against the dense chocolate is absolutely unbeatable.
- Fresh Berries: I love serving fudgy vegan gluten-free brownies with fresh raspberries or sliced strawberries. The zippy tartness of the fruit cuts through the richness of the chocolate, making the whole dish feel vibrant and fresh.
- Espresso or Coffee: If you’re enjoying this as an afternoon pick-me-up, pair it with a shot of espresso or a strong black coffee. Coffee naturally enhances chocolate notes, making the cocoa flavor feel even deeper and bolder.

Common Brownie Substitution FAQs
What is the secret to super fudgy brownies?
The secret lies in the fat-to-flour ratio and the baking time. This recipe uses a higher ratio of almond butter and coconut oil to flour, which eliminates “cakey” textures. Also, taking them out when they still look slightly underbaked is crucial; they firm up as they cool, remaining dense and fudgy in the center.
Can I freeze these adaptable brownies?
Absolutely! These freeze beautifully. Once they are completely cooled and sliced, wrap them individually in parchment paper and store them in a freezer-safe bag for up to 3 months. It’s actually a great meal-prep hack: thaw one on the counter for 15 minutes when a craving hits.
How can I make these brownies more special for an event?
To elevate these for a party, try adding a sprinkle of flaky sea salt on top right after they come out of the oven. You could also drizzle melted chocolate or a vegan caramel sauce over the cool brownies. It adds a professional “bakery-style” finish that looks impressive but takes zero effort.
Conclusion
There you have it, a truly adaptable brownie recipe that doesn’t sacrifice flavor for function. Whether you’re baking for a specific allergy or want a delicious, wholesome treat that uses one bowl, this recipe has your back. I’d love to hear how you customized yours! Did you try a different nut butter or add a fun mix-in? Drop a comment below and share your results; your tips help the whole community bake better!